Vinyl Liner Pools Builders Richmond, VA
Vinyl Liner Pool Construction
You and your designer have created a place for your pool, now it is time for Douglas Aquatics crews to execute the project in your backyard.
This outline details the construction process for your new pool and provides answers to potential questions that might arise during the different phases.
Please reference the outline as you move from phase to phase.
The staff at Douglas Aquatics understands that any construction project will cause some disruption in your everyday routines, but please be patient and rest assure that we will make every effort to complete your pool project as rapidly and painlessly as possible.
During the construction period, you will see such things as excavation equipment driving across your property, digging a hole in your backyard and creating lots of dust.
Everything will appear disorganized and unsightly; most of this cannot be helped and you may lose some of your privacy. Let us assure you that we want to finish the job as soon as possible and we will complete it in accordance with the contract unless unforeseen circumstances arise.
We schedule our crews in accordance with the need for them on the next phase not only for your project, but all other jobs going on at the same time.
So, please don’t be alarmed if you do not see our men for several days. Our Construction Manager should advise you if this happens.
Our Construction Manager will be stopping by regularly to check the project. If there are any questions, please contact your designer at 804-232-POOL (7665) or on our contact forms.
Once again, all of us here at Douglas Aquatics, Inc. look forward to building your pool.
-
Preparations
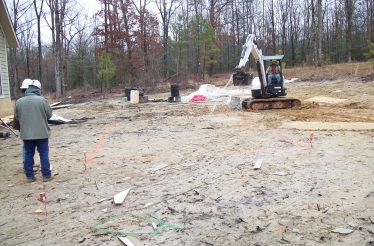
Once the site is prepared, the pool is laid out using stakes, boards, and/or lines. These represent the outer edge of the coping, or about one foot outside the water line. You or your representative must be present at this phase for the purpose of coordination between our sales and construction departments. Many important details are discussed at this meeting which affects the entire job from this phase to its completion.
-
Excavation
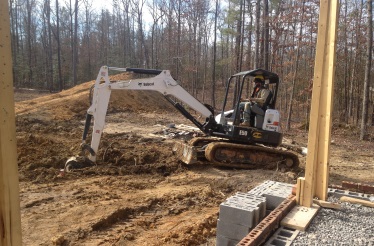
During this stage, the earth from your pool is removed. It is either hauled away or kept on site for backfilling as necessary for the later phases of construction, depending on what your contract stipulates. With normal soil and access conditions, excavation will be completed within one to two working days. It is important that you or your representative be available during this operation in case an unknown obstacle is unearthed. If such a problem develops, our staff will want to consult with you, as this could result in an increased cost to you.
-
Wall Assembly & Erection
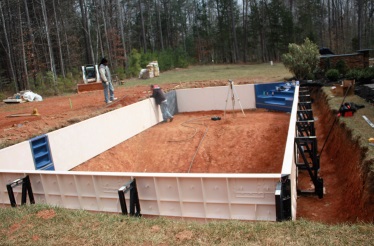
After the pool has been excavated, we will begin assembling the wall panels and stairs for installation. The panels will be secured together and placed on the shelf of the excavation. An anchoring A-frame will be installed at each panel joint and each panel leveled. During this process, your pool stairs will be installed. Our crew will complete the pool wall erection and stair installation and then a concrete collar is poured around the entire base perimeter of the pool wall. This will assure that each panel is properly set and secure, so that it will not move during the next phases of construction.
-
Plumbing
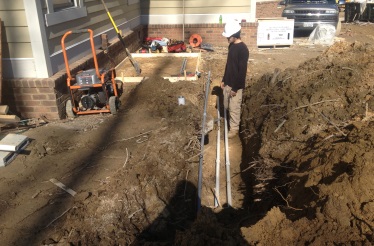
After the pool has been excavated, we will install the plumbing from your pool to the filter system. The main drain line(s), return line(s) and floor fittings are stubbed in and the skimmer(s) are secured. All the plumbing will be pressure tested to assure that there are no leaks in the system. They will be kept under pressure throughout the construction process. Should the pressure go down at any time, we will check for any damage to the plumbing line(s).
-
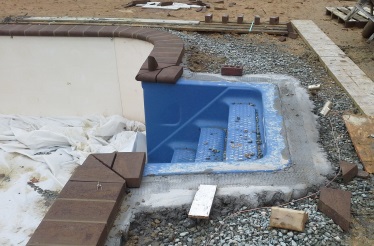
Coping
When you choose your vinyl liner pool, you may also have selected coping. The coping is the piece that connects to the top of the wall panel and the concrete surround or collar. Your coping will now be installed and secured to the top of the pool wall. Upon completion of the coping installation, coping clips will be installed to hide seams where different pieces of coping meet.
-
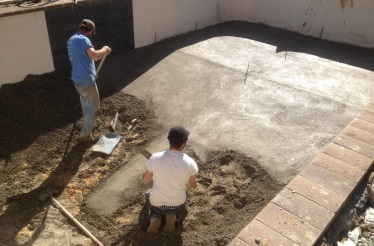
Vermiculite
The pool bottom must be finished and shaped before the liner can be positioned. A vermiculite base will be applied to the excavated material at the bottom of your pool.
-
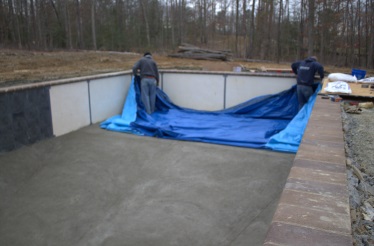
Installation
At this point almost all of the work is complete, except for the finishing touches. The vinyl liner can now be installed. Our crew will secure the liner and eliminate as many wrinkles as possible by pulling and positioning the liner. Once the liner is positioned, the liner bead is inserted into the bead receptor channel of the coping. Once the liner bead has been completed, a vacuum hose will be inserted between the liner and pool wall. The liner will be taped to the vacuum hose to make it airtight. The vacuum will begin to make the wrinkles disappear and we will now start filling your pool.
-
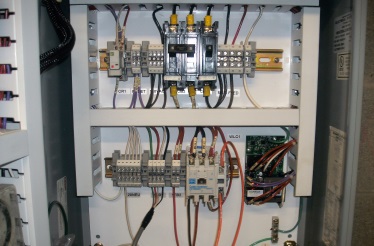
Electrical
The electrician can begin work immediately after the pool and/or spa steel is completed. Please have your electrician contact our Construction Coordinator upon applying for the electrical permit so we may coordinate our efforts.
-
Pool Decking
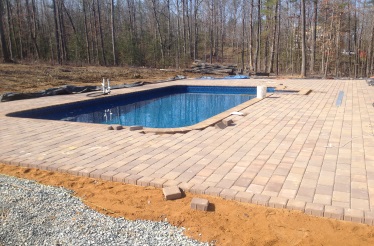
At this point the area surrounding the pool will be rough graded in preparation for the deck. In most cases, all the trenches will be filled in. Before pouring the deck, in addition to the piping and wiring, anchors for ladders, grab rails and handrails will be set and jigs or standards for diving boards must be installed. The installation of the above items MUST be taken care of before your deck contractor pours.
-

Fencing
Building codes require that fences around yards be at least 48 inches above grade with a maximum vertical clearance between grade and bottom of the fence to be no more than 2 inches. The code also states that the access gate shall be equipped with a locking device. Pedestrian access gates shall open outward away from the pool and shall be self-closing and have a self-latching device, with the device being located at least 54 inches above grade.
-
Alarms
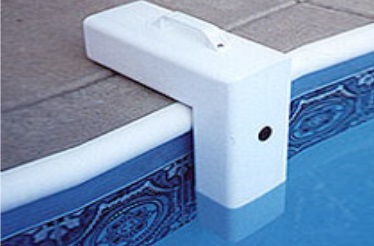
All doors with direct access to the pool through that wall shall be equipped with a hard-wired or battery powered alarm, which produces an audible warning when the door and its screen, if present, are opened. The alarm shall sound continuously for a minimum of 30 seconds immediately after the door is opened and be capable of being heard throughout the house during normal household activities. The alarm shall automatically reset under all conditions. The alarm system shall be equipped with a manual means, such as touchpad or switch, to temporarily deactivate the alarm for a single opening. Such deactivation shall last for no more than 15 seconds. The deactivation switches shall be located at least 54 inches above the threshold of the door.
-

Start-Up
Once your pool water is balanced, your sales designer will schedule an appointment to meet with you. The sales designer will instruct you on the operation of your filtration system. You will also be given your warranty information on your pool equipment, as well as a set of filter instructions to keep for your records.
-

Final Inspection
You will need to schedule an appointment with your electrician so they may have the final electrical inspection called in to your local building department. Once that is done, we will contact you to schedule an appointment for the final inspection with the local building department. Following this last inspection the signed permit will be yours to keep.


